
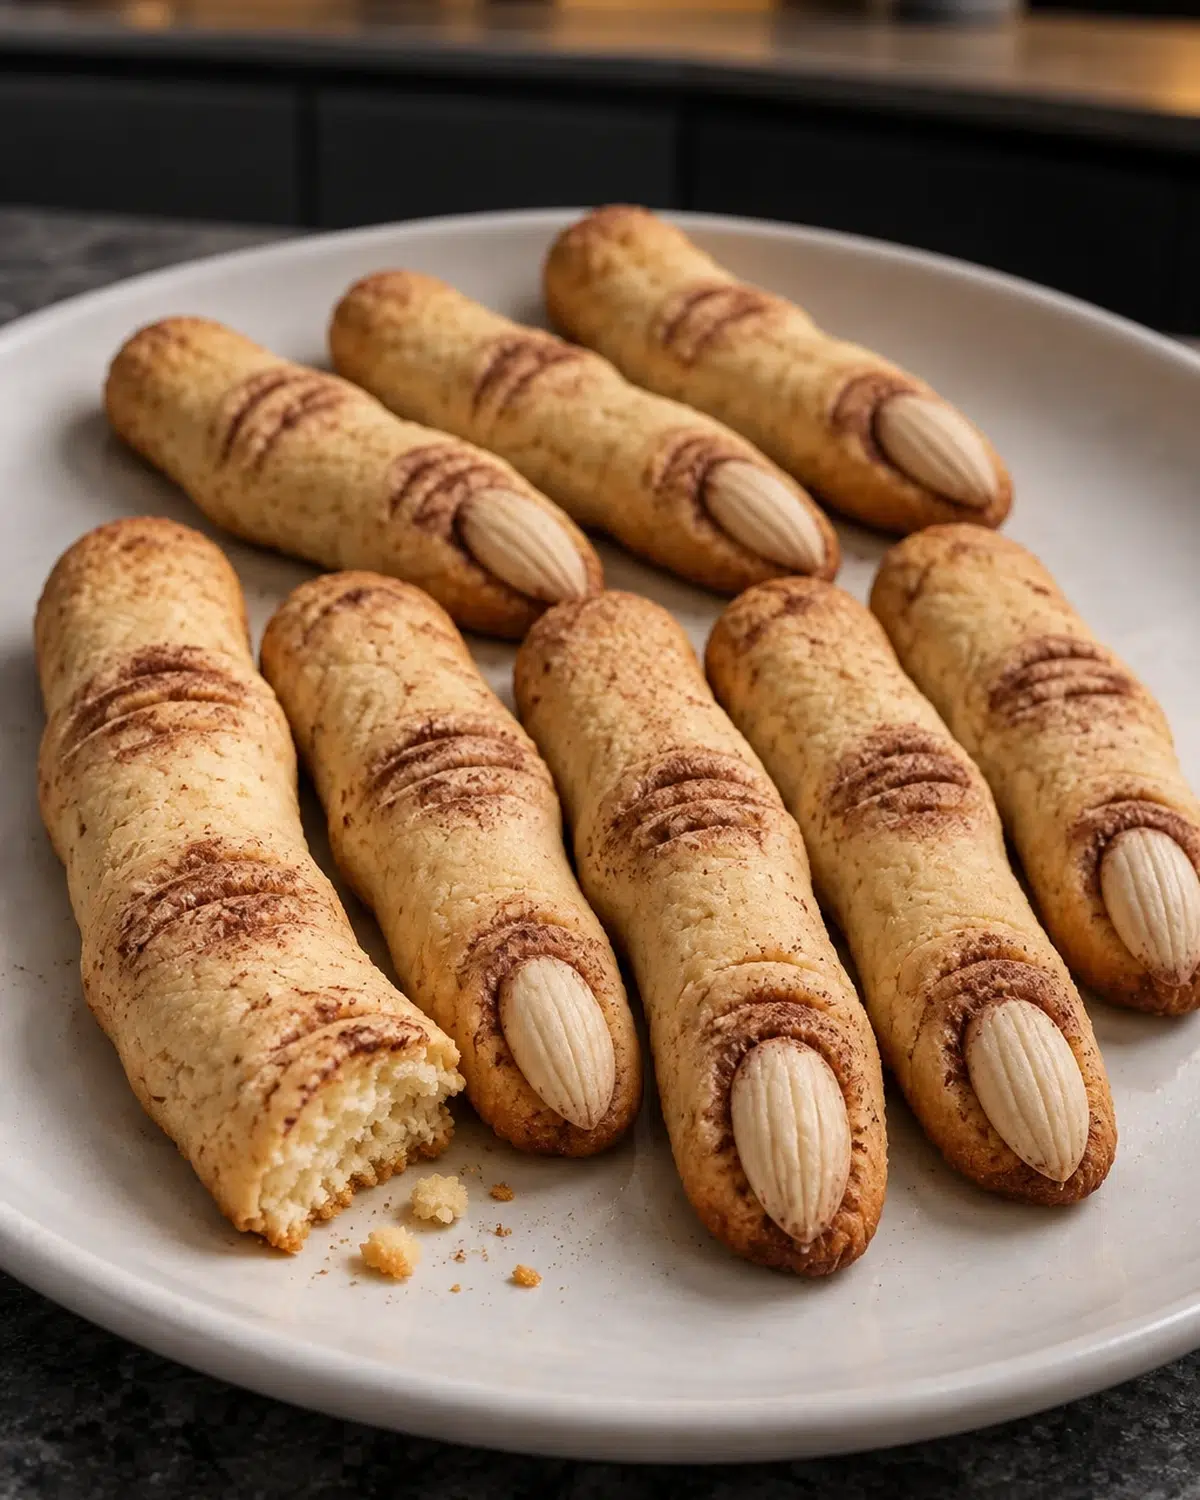
Most Halloween cookies on the table are frosted, iced or rolled in sprinkles, and every one of those toppings is sugar. These sugar-free witch finger cookies keep the whole decoration edible: a blanched almond for a nail, and cocoa powder brushed into the knuckle lines.
The dough is almond flour and coconut flour sweetened with allulose, so there is no white flour and no sugar anywhere in it. Eight fingers come out of one 13 by 18-inch sheet in about 25 minutes of prep and 15 to 18 minutes in the oven, at roughly 1g net carbs each.
If you want a second cookie on the same plate, the sugar-free chocolate chip cookies are the soft, chunky counterpoint, and the sugar-free ginger-spice cookies use the same spice-and-warmth idea in a different shape.
Why You’ll Love These Sugar-Free Witch Finger Cookies
- The spooky detail is built into the dough, so there is no icing, no jam and no candy to buy.
- One blanched almond pressed into the tip reads as a nail at any distance.
- The dough is rolled and chilled twice, so the fingers keep their shape in the oven instead of spreading.
- All eight bake on a single rimmed sheet, which matters when the oven is already on for something else.
- Every spooky detail comes from the dough itself, so sugar-free witch finger cookies need nothing from the candy aisle.
Ingredient Notes for Sugar-Free Witch Finger Cookies
About two-thirds cup of super-fine almond flour and 2 tbsp of coconut flour give the dough its structure, and neither brings sugar with it. The cinnamon is there for warmth and for the color, not for sweetness, and nothing in these sugar-free witch finger cookies needs icing to look spooky.
The sweetener is pure granulated allulose, used at about 3 tbsp. Allulose is a rare sugar that the FDA allows to be excluded from the total sugars and added sugars declarations on the Nutrition Facts label. It also browns faster than sugar, so these sugar-free witch finger cookies need watching near the end of the bake.
The nails are 8 whole blanched almonds, one per cookie. For the details, about 2 tsp of unsweetened cocoa powder gets brushed into the creases with the dull edge of a butter knife.
Ingredient weights and per-serving numbers here come from the USDA FoodData Central database, and the nutrition figures in the recipe card are kept exactly as written.
How to Make Sugar-Free Witch Finger Cookies
Prep takes about 25 minutes, baking 15 to 18 minutes, and the dough chills twice for a total of 45 to 55 minutes. That chilling is what makes sugar-free witch finger cookies hold their shape.
Step 1 — Line a 13 by 18-inch rimmed baking sheet with parchment.
Step 2 — Beat the butter and allulose until creamy, then beat in the egg.
Step 3 — Mix the almond flour, coconut flour, baking powder and cinnamon. Stir into the wet mixture to form a soft dough.
Step 4 — Rest the dough 5 minutes, then chill 25 to 30 minutes.
Step 5 — Heat the oven to 325°F (163°C).
Step 6 — Divide the dough into 8 equal portions.
Step 7 — Roll each portion into a 3½ to 4 inch finger about ¾ inch thick. Shape two raised knuckles and taper one end.

Step 8 — Press one blanched almond into each tapered tip for the nail.
Step 9 — Use the dull edge of a butter knife to make shallow knuckle lines and a few smaller wrinkles near the nail.
Step 10 — Lightly brush cocoa into the creases and around the nails.

Step 11 — Place the cookies 1½ inches apart and chill 10 to 15 minutes.
Step 12 — Bake 15 to 18 minutes until lightly golden and set but still tender.
Step 13 — Cool 10 minutes on the pan, then transfer carefully and cool completely.

For the rest of a Halloween table, the sugar-free ghost cheesecakes are a chilled party treat that needs no baking after assembly, and the sugar-free forgotten meringue cookies are the light, crisp-cookie option if the platter is already crowded.
Success Tips for Shaped Witch Fingers
Keep the fingers slightly thick so they hold their shape. Rolling them thinner gives you something that bakes up soft and loses the knuckle detail that makes sugar-free witch finger cookies read as fingers.
Press the almond nails in firmly before baking, while the dough is still chilled. A light press leaves an almond sitting on top instead of set into the tip.
Watch the bake closely, because allulose browns quickly. Pull the fingers when they are lightly golden and still tender in the middle, not when they are deep brown.
Cool the cookies fully before moving them. They are tender right out of the oven, and lifting them early is how these sugar-free witch finger cookies break at the knuckles.
Storage and Serving
These are a same-day bake. The dough is mixed, rested, chilled, shaped, chilled again and baked in one sitting, and this recipe does not set a keep time, so plan to bake the sugar-free witch finger cookies on the day you are serving them. Let them cool completely on the pan and then transfer them carefully.
FAQ
Why do sugar-free witch finger cookies need two chills?
The first chill, 25 to 30 minutes, firms the dough so it can be rolled into fingers without sticking. The second chill, 10 to 15 minutes after shaping, sets the knuckle lines and the almond nails so they survive the oven.
Can I use a lined baking sheet instead of parchment?
Use parchment, on a rimmed 13 by 18-inch sheet. These cookies are soft and thick, and parchment is what lets you lift them off without tearing the knuckle ridges.
How do I get the knuckles to show?
Shape two raised knuckles before the dough goes on the sheet, then press shallow lines across them with the dull edge of a butter knife. Brush cocoa into the creases and the lines read clearly once baked.
How do I know when they are done?
Bake 15 to 18 minutes at 325°F (163°C) until the fingers are lightly golden and set but still tender. Allulose browns quickly, so start checking a couple of minutes before the end of the range.
Do these witch finger cookies have icing or jam?
No icing and no jam. The only decoration is the almond nail and cocoa brushed into the creases, so these sugar-free witch finger cookies are spooky from the outside in.
Sugar-Free Witch Finger Cookies for Halloween
Ingredients
Equipment
Method
- Line the baking sheet with parchment.
- Beat butter and allulose until creamy; beat in egg.
- Mix almond flour, coconut flour, baking powder, and cinnamon. Stir into the wet mixture to form a soft dough.
- Rest 5 minutes, then chill 25–30 minutes.
- Heat oven to 325°F (163°C).
- Divide dough into 8 equal portions.
- Roll each into a 3½–4-inch finger about ¾ inch thick. Shape two raised knuckles and taper one end.
- Press one blanched almond into each tapered tip for the nail.
- Use the dull edge of a butter knife to make shallow knuckle lines and a few smaller wrinkles near the nail.
- Lightly brush cocoa into the creases and around the nails.
- Place cookies 1½ inches apart and chill 10–15 minutes.
- Bake 15–18 minutes until lightly golden and set but still tender.
- Cool 10 minutes on the pan, then transfer carefully and cool completely.
Notes
- Keep the fingers slightly thick so they hold their shape.
- Press almond nails in firmly before baking.
- Watch closely; allulose browns quickly.
- Cool fully before moving to avoid breakage.